Even before we started building the house, I knew “we” needed to have a greenhouse somewhere on the property. At first I thought we could build it behind the well-house that was already on the property. It looked like the previous owner had planned to add another room. But after investigating, we realized that the sun would never get to that area. Not ideal for a greenhouse. So the better plan was to add onto the side.
After much persuading, I finally convinced Jim that we could takeover a section of the already built well-house (preferably the nasty bathroom) and convert it to a greenhouse. Then the other room can be used for storage and a dog wash (another must).
Of course, this was all just in the planning phase and would probably take us years to get to. Buuuuut…then the Covid happened, our Hawaii vacation got cancelled and Jim had two weeks off to kill…so…why not rent a dumpster and get started now?
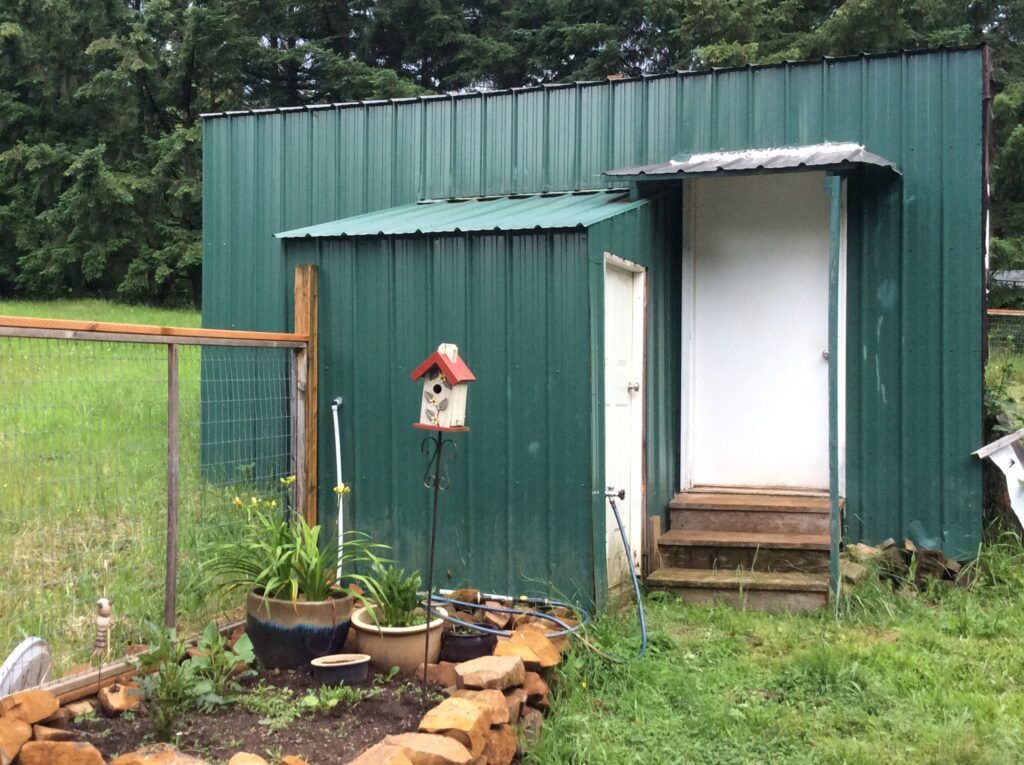
The Before
Because you need a before…it’s pretty ugly. And those steps…a death trap. The right wall was never finished and the back wall was only covered in plastic. Definitely an eye sore.
Demo Day
The bestest part of any project usually involves a sledge hammer. Unfortunately I was working when the dumpster first arrived so I missed the beginning and came out to this after work:
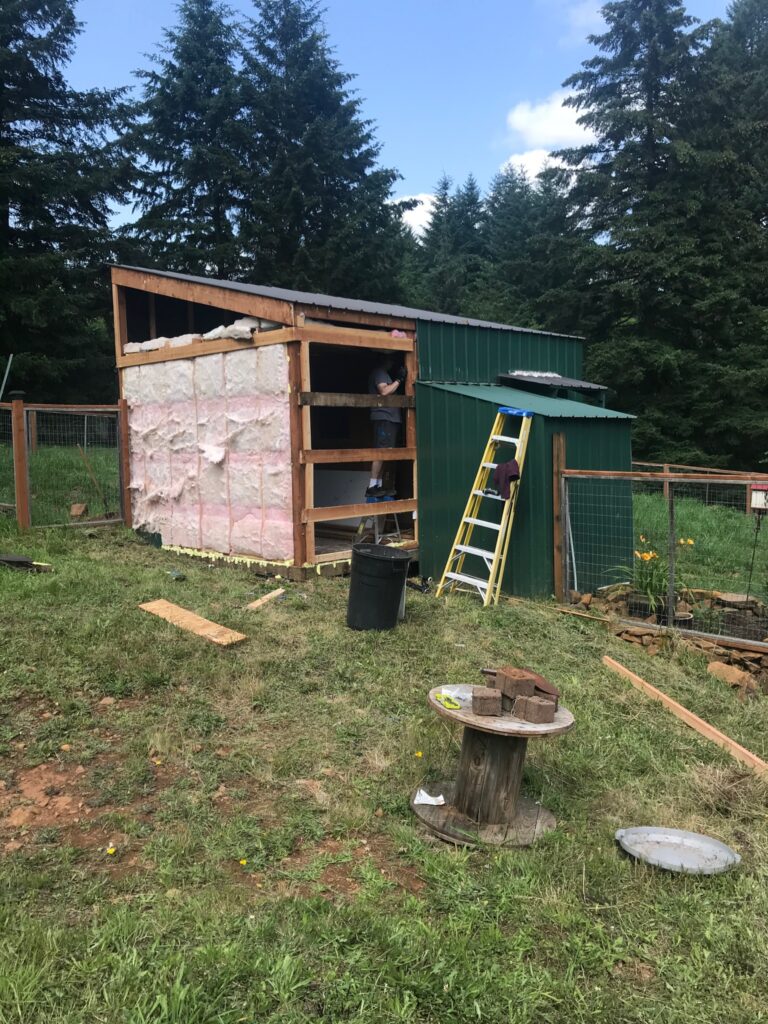
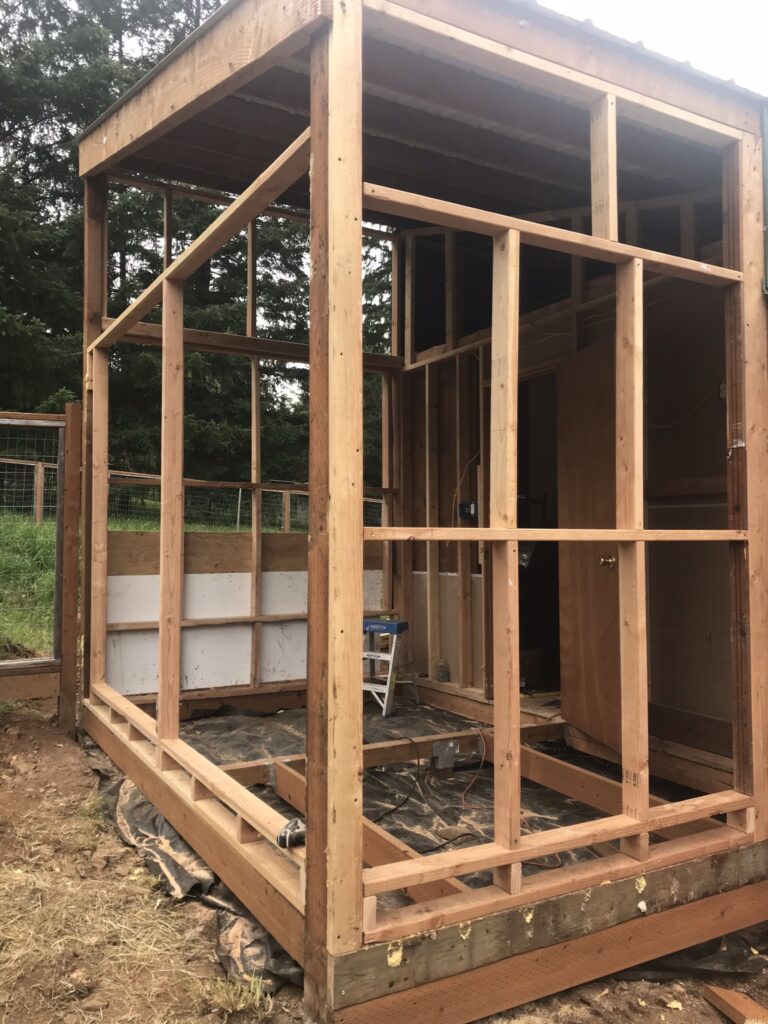
As you could probably tell, the original construction was pretty half-ass. As we pealed back the layers, we were so shocked at the construction. Thankfully we were planning on rebuilding these walls anyways…and we saved a lot of usable wood to fix up the not so well done construction.
And removing that nasty bathroom was such an improvement.
Once we had all of the walls down and the footing boards replaced with actual pressure treated wood, we were able to start planning out the walls for the windows.
My insanity pays off
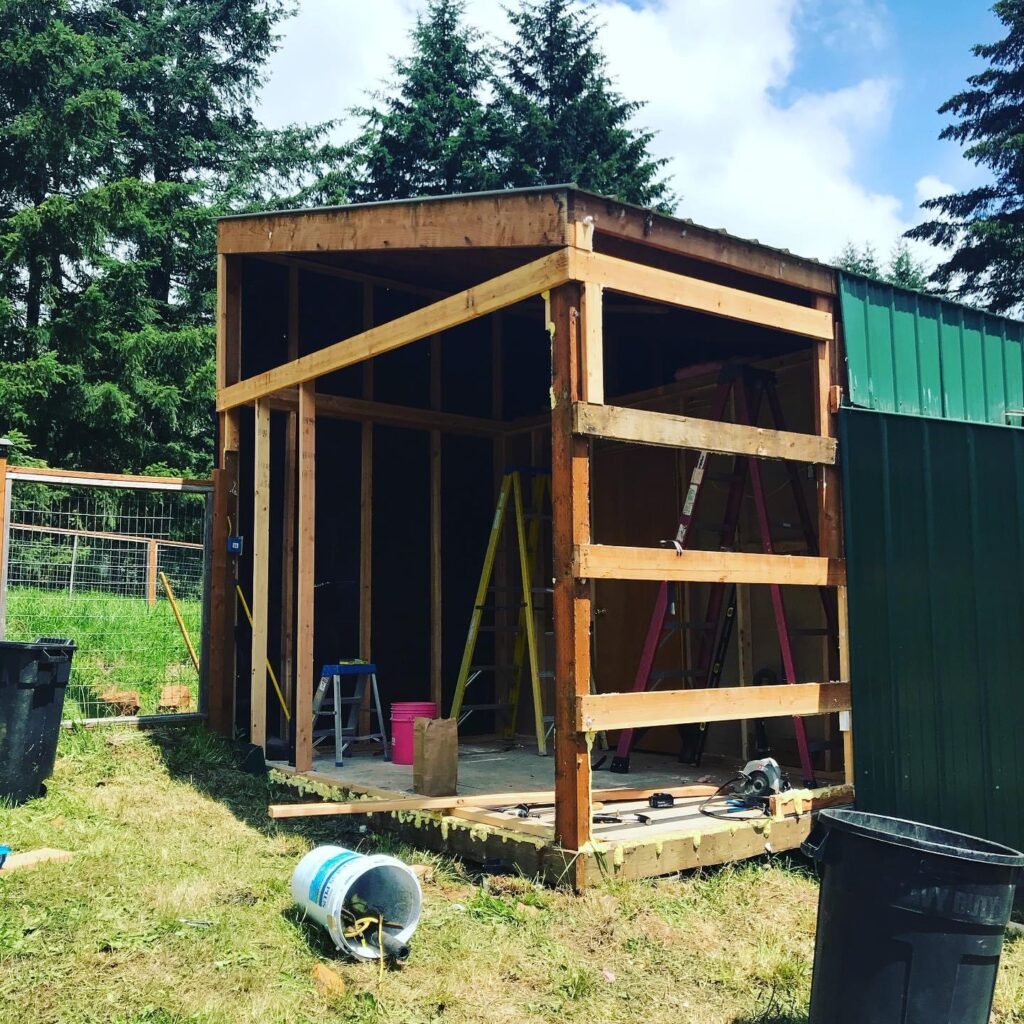
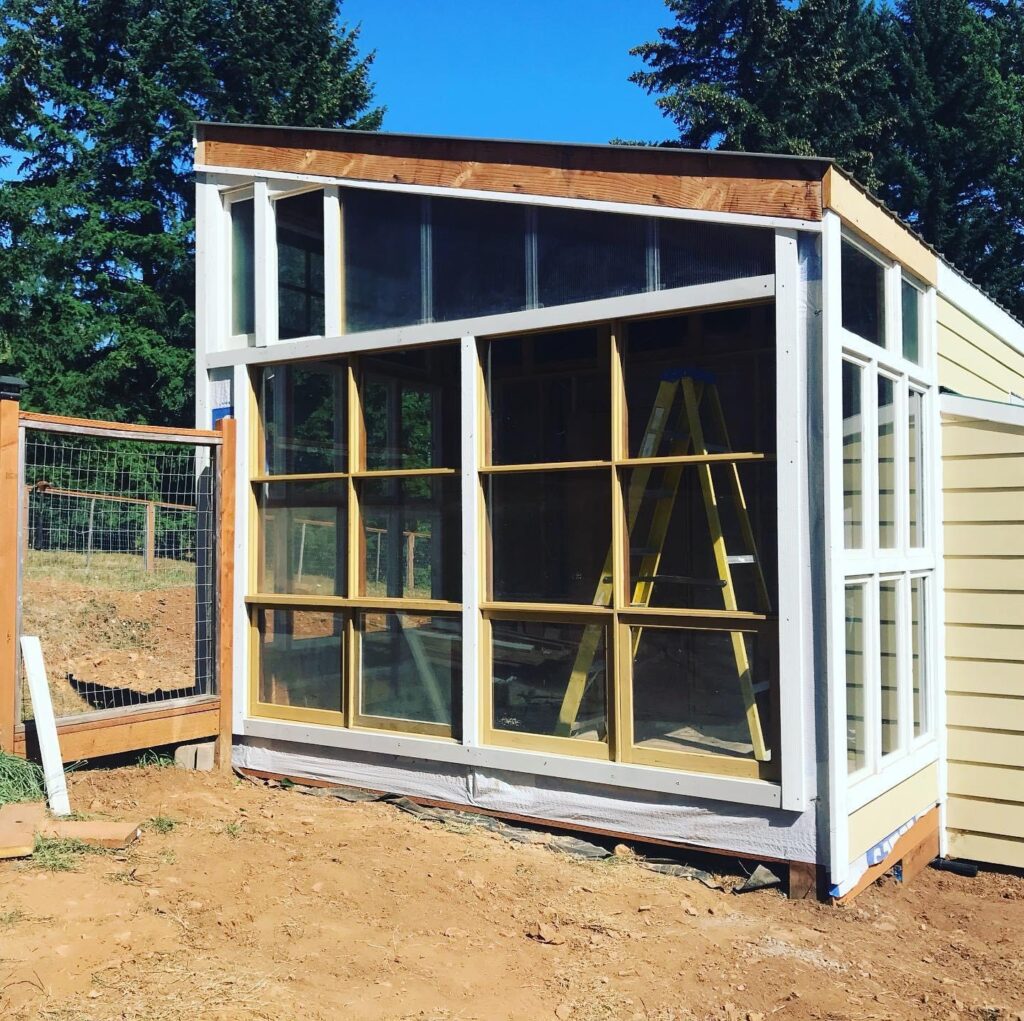
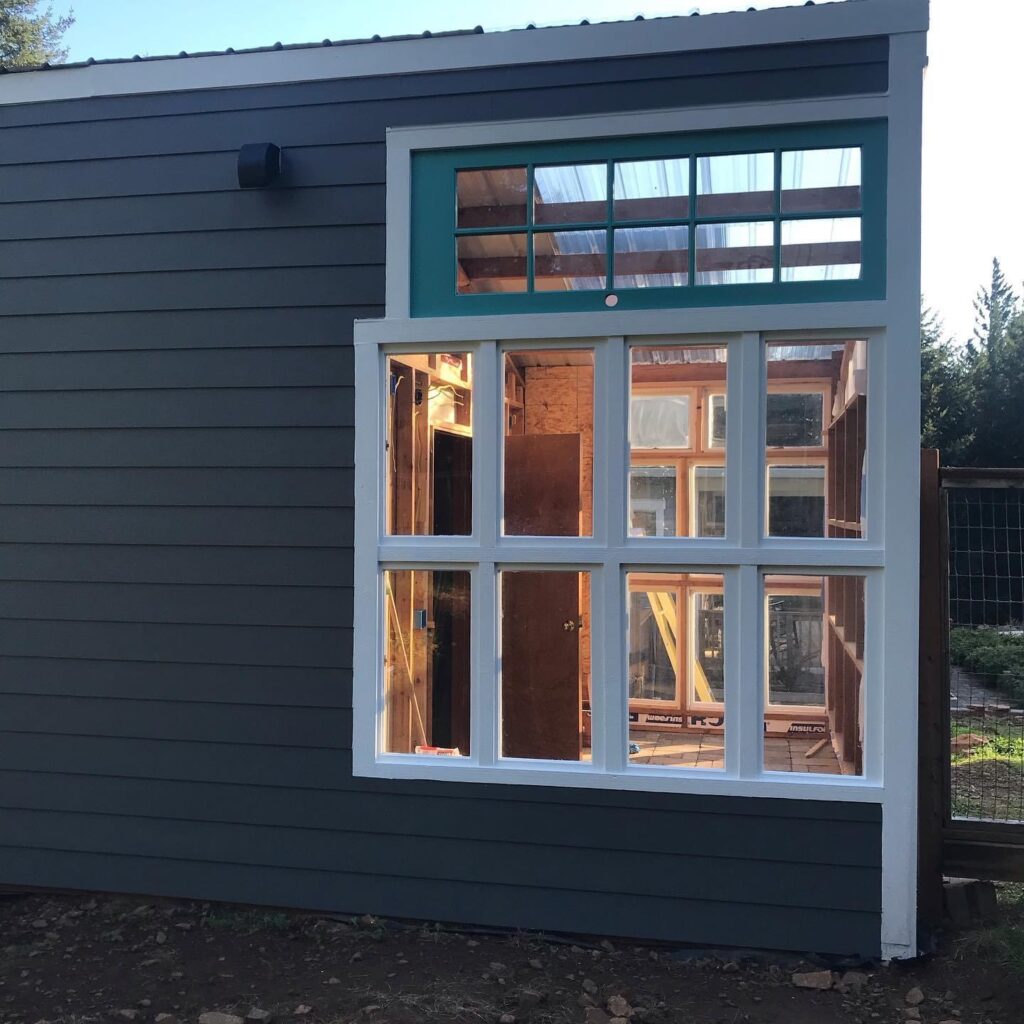
I don’t know why Jim always doubts me. I’m brilliant…always thinking ahead. Like over 3 years ago when we lived in Camas and I scored these ginormous framed wood windows (two of them open) on the local marketplace. So what if they were a pain in the ass to store…and move…and sat under our carport for three years. It took a little pony wall and one center stud to frame an entire wall….BAM! One wall framed.
The other two walls…well I’m lucky as hell. Once we fast forwarded our plans, I realized I needed more windows…so I scoured the marketplace…and Craigslist ready to buy as many windows as Jim would let me…and so scored. This awesome human was getting rid of 8 old double hung windows…which actually is 16 windows. All for frees! And just 20 minutes away. And bonus (and major tip if you ever decide to build a greenhouse with lots of old windows)…they were all pretty much the same size making framing so much easier. Here are all of the walls laid out.
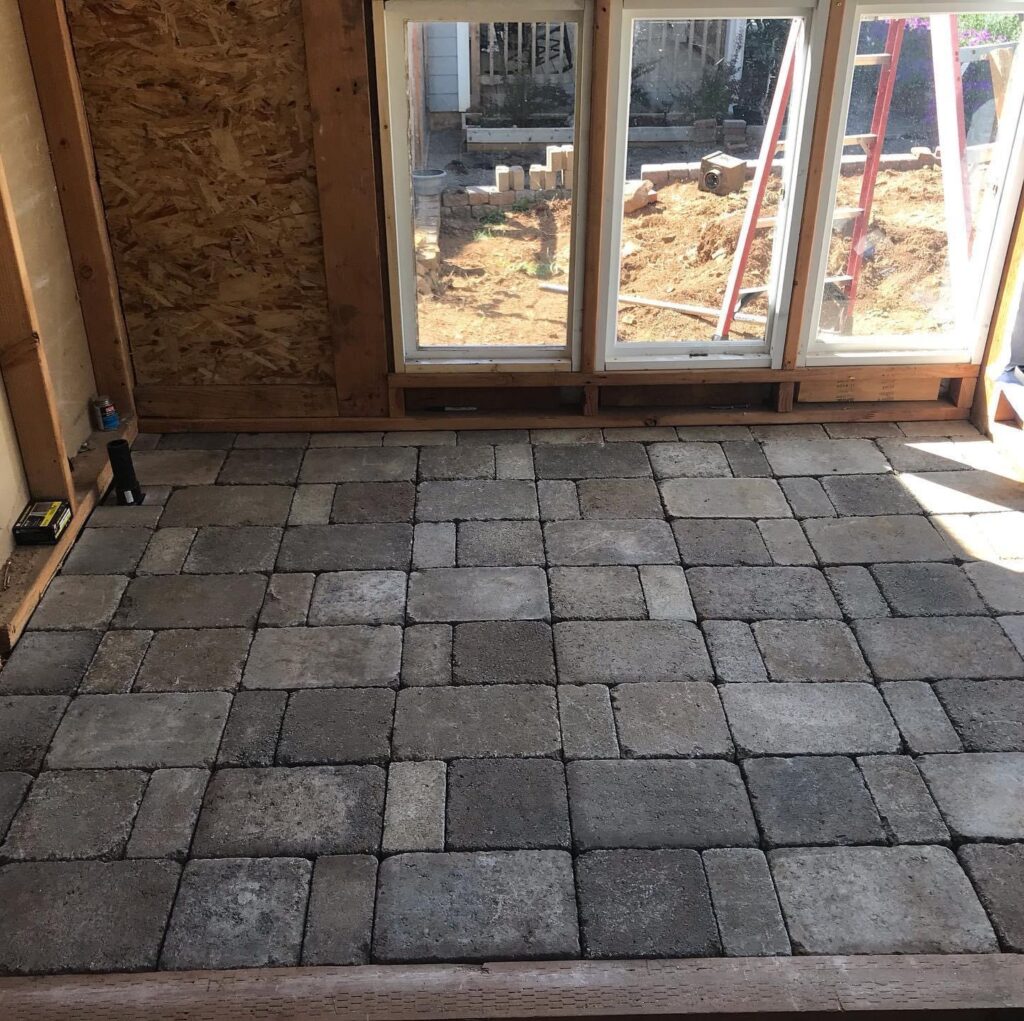
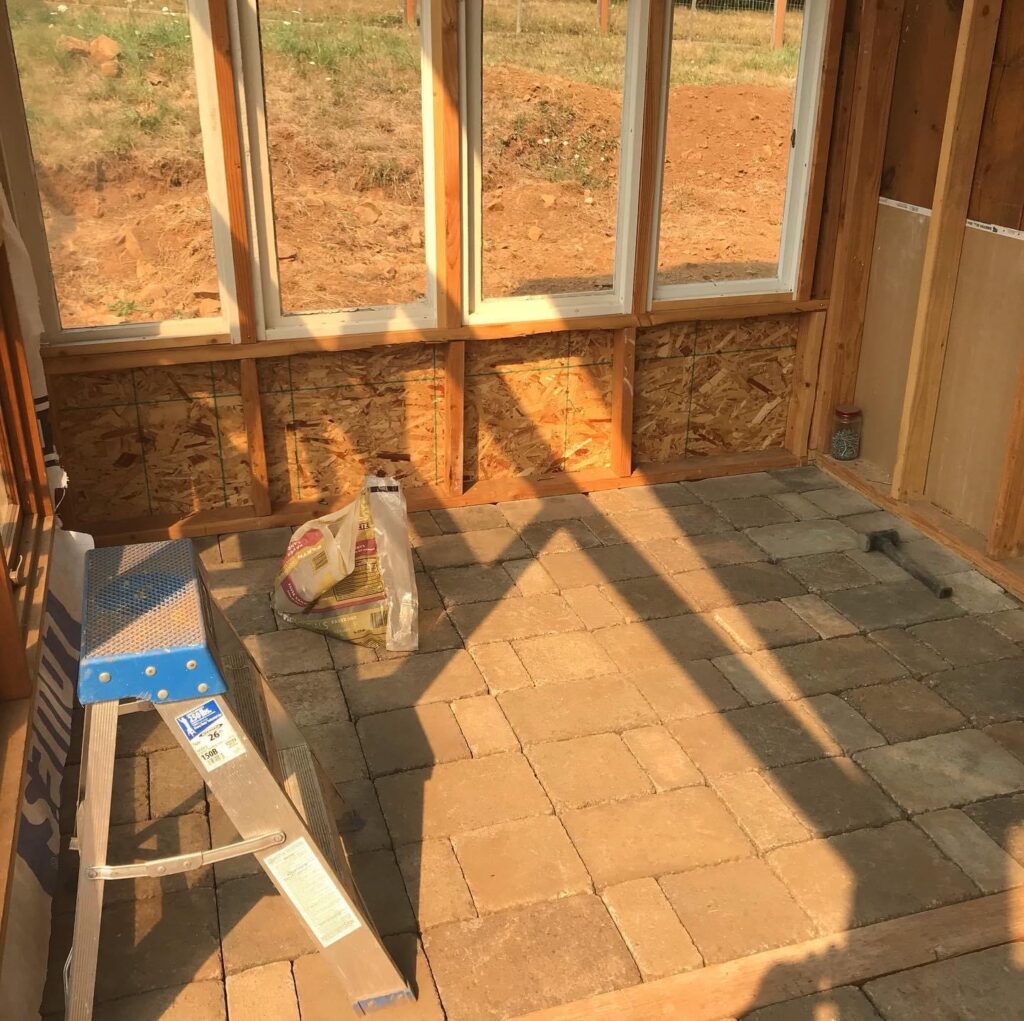
Oh, and if you noticed, we also ripped out the floor so that we could add pavers as the floor of the greenhouse.
Onto the other half
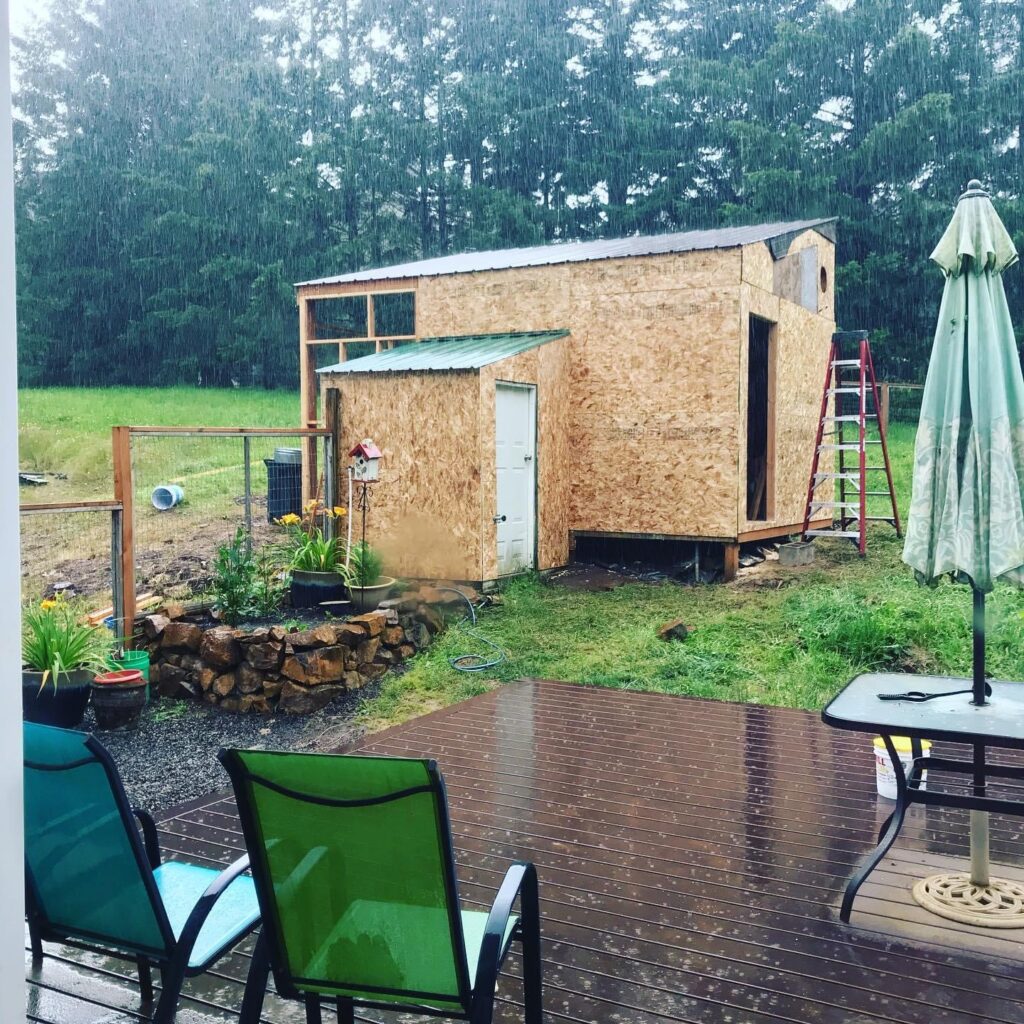
Since we had the new greenhouse side pretty well prepped, we moved onto the other walls. After removing the metal siding (and plastic and unfinished gross walls) we properly added sheeting. We also wanted to move the shed door to the side so we framed out that front wall and added in a window.
Tangent: Did I ever tell you that our contractors totally framed two of our windows wrong and then ordered the wrong sized windows? I made them fix the framing to the correct size but, of course, they never changed the order. So when the windows came in, instead of realizing their mistake, they reframed the windows back to wrong and installed them. Heh. So eventually those got removed and corrected, and we hung onto the wrong windows. Free windows!
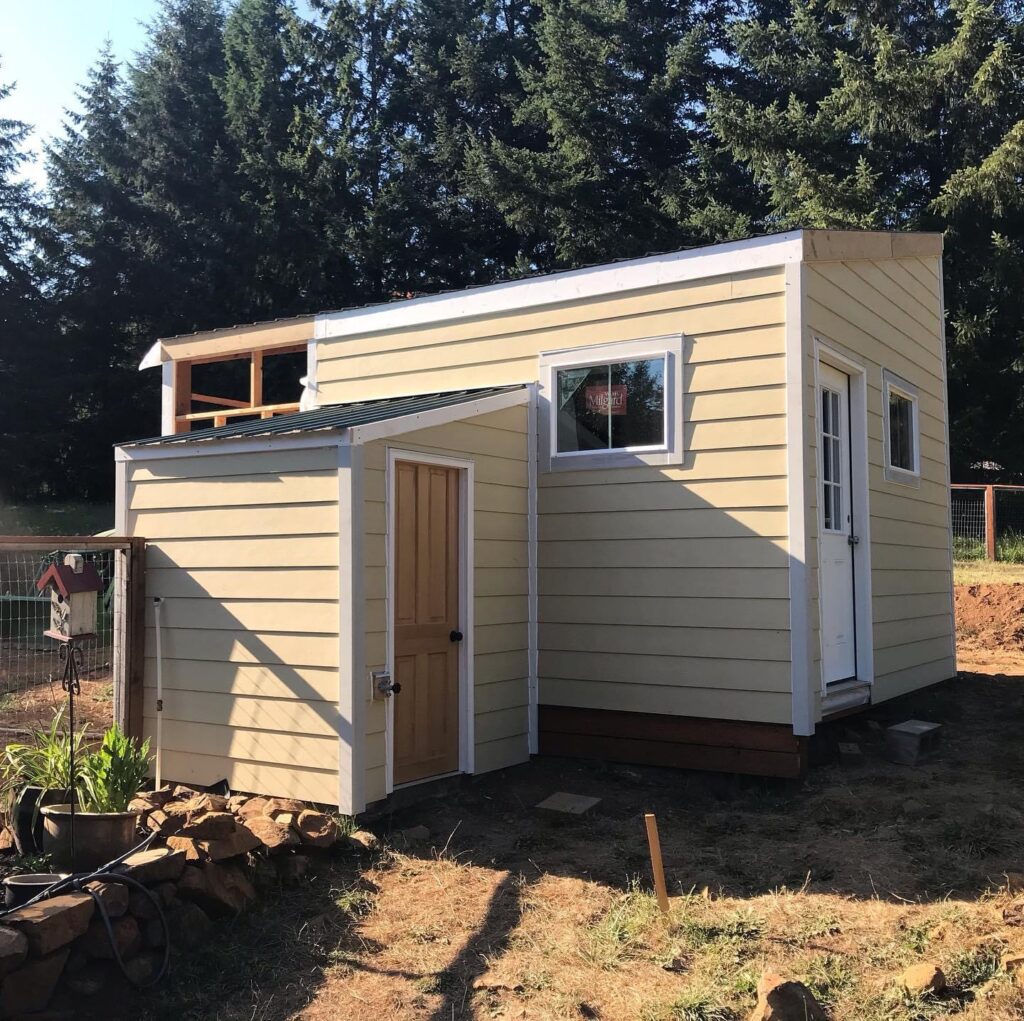
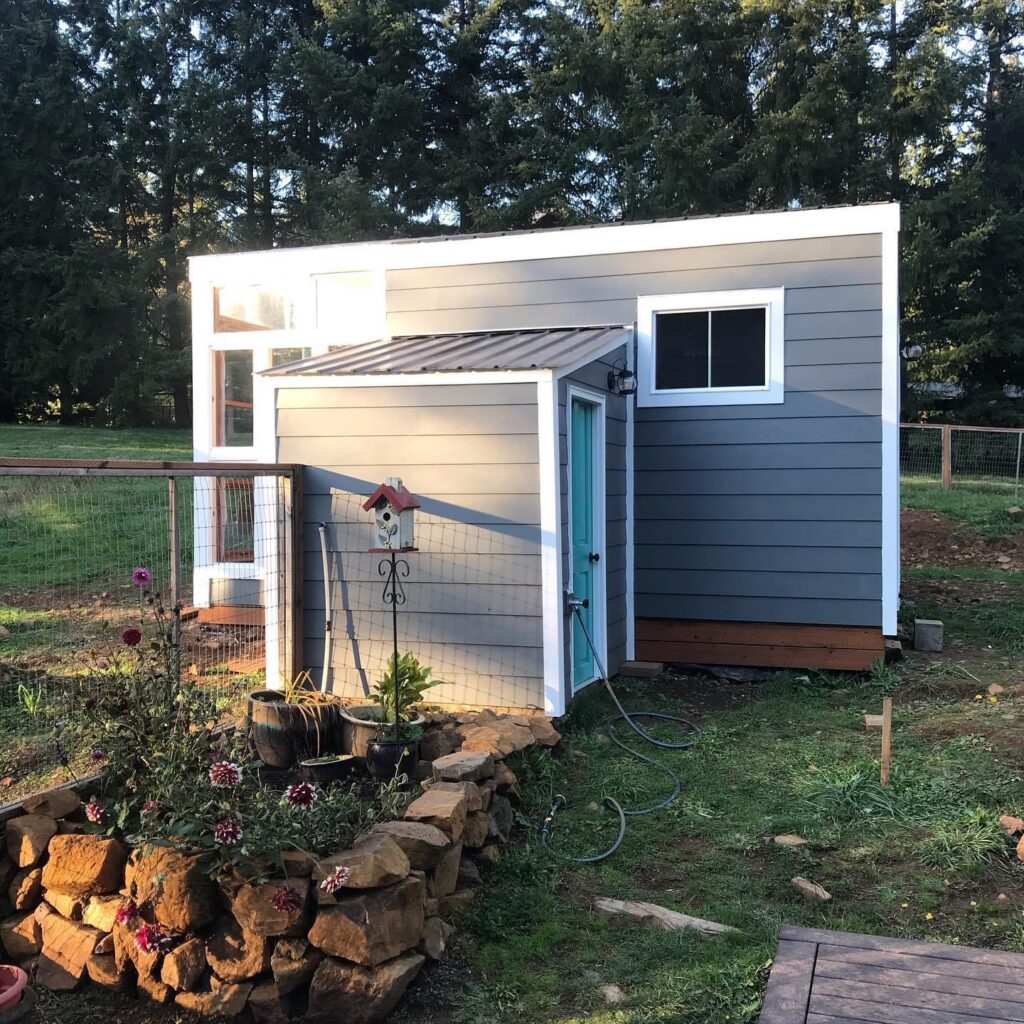
Anywho, we put one window where the door was and replaced the other window on the side while framing a new door opening. Much better layout. And no more death trap stairs. We wrapped up the walls to prep for siding. Pun ahead…that’s a wrap!
Hire professionals = Get it done in just over a day
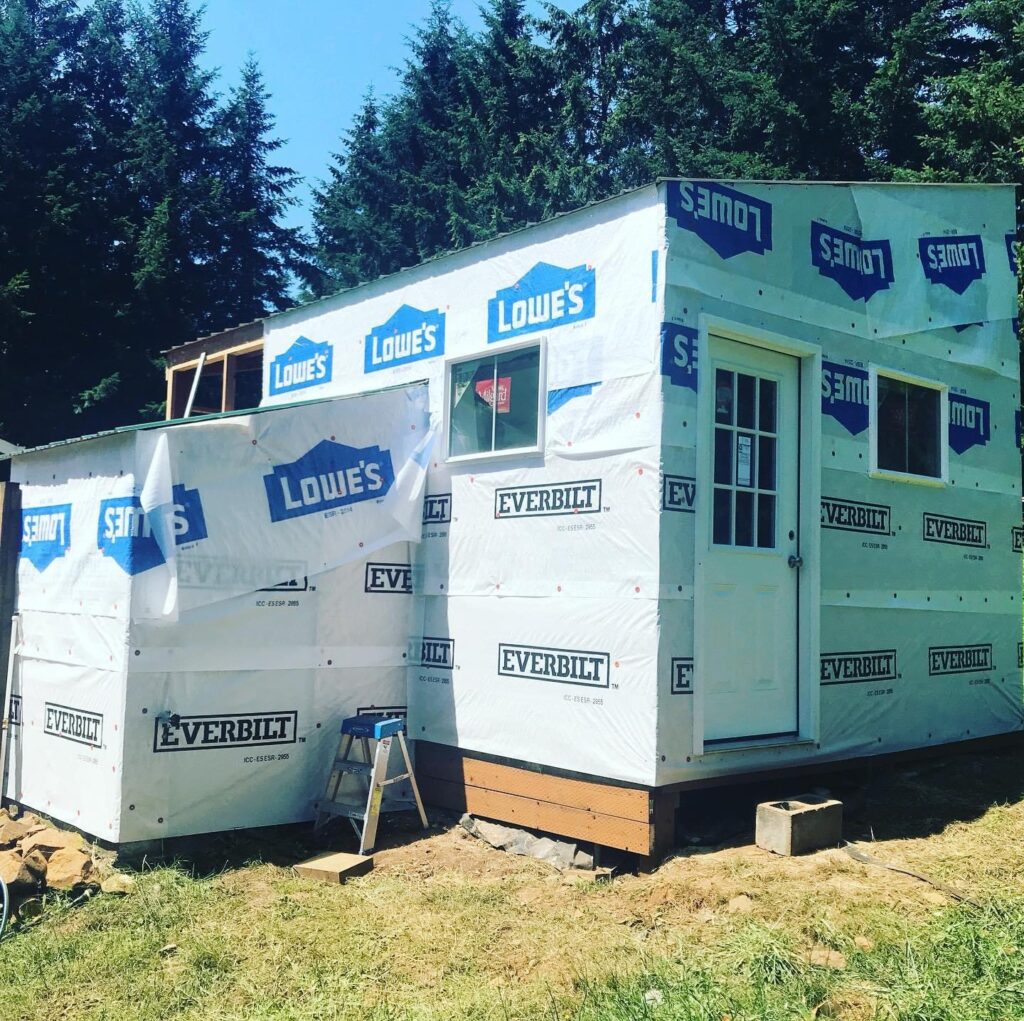
To match the house, we wanted to use the same hardiplank siding. Even though Jim was up for the challenge (I think he just wanted new tools), I found a local contractor who was very reasonable and reliable (showed up right when he said he would!).
In just a little over a day, it was done!
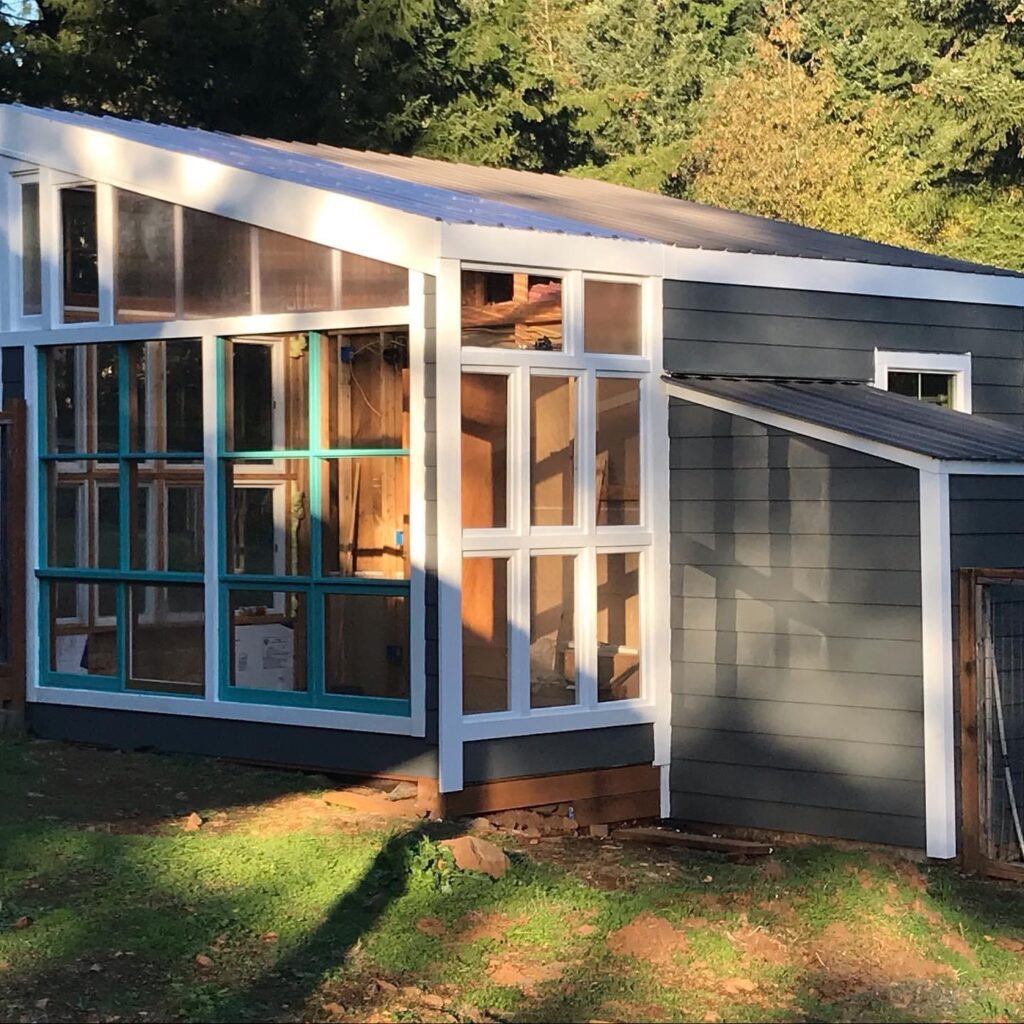
Back to the Windows
With the siding installed, we moved back to the greenhouse to start putting in the windows. We had already done the back wall before the siding as we needed to get that wall done to keep the dogs from escaping the yard. So it was pretty easy to finish the front wall.
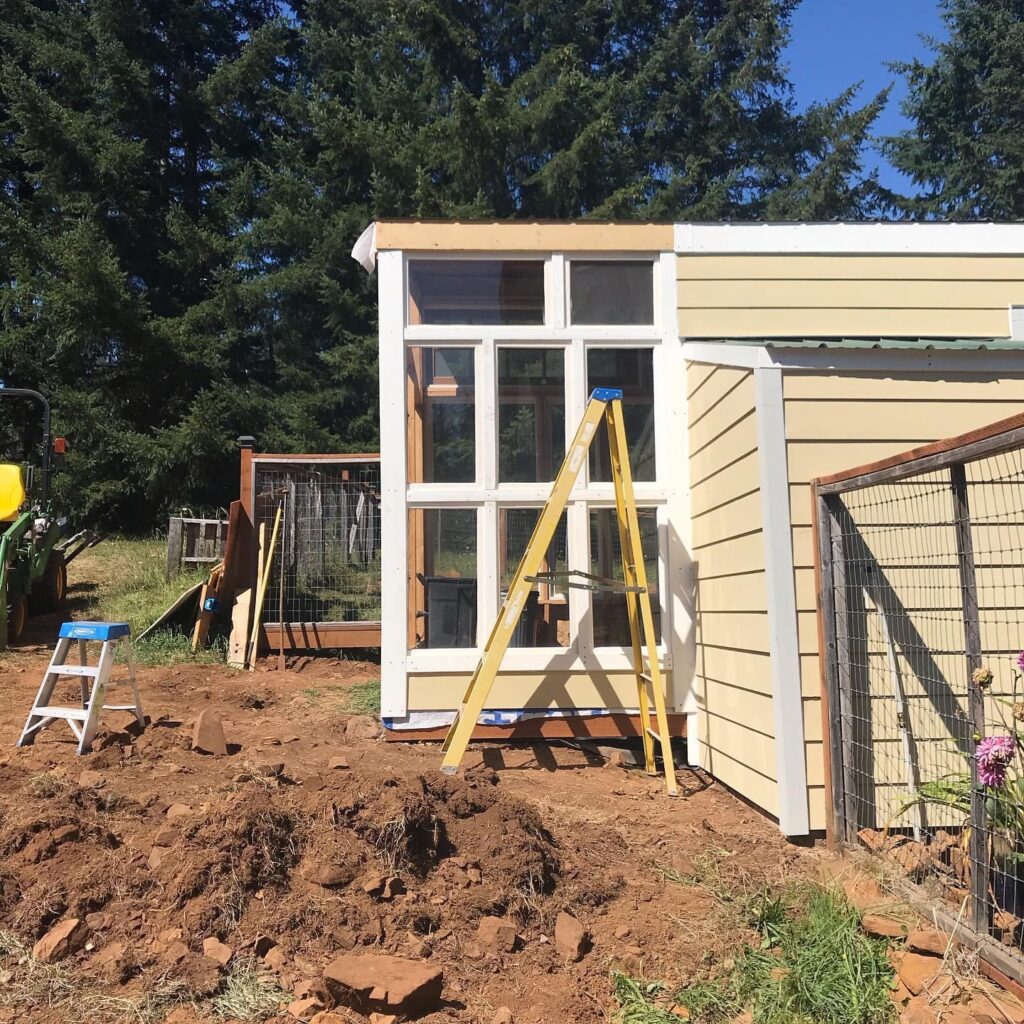
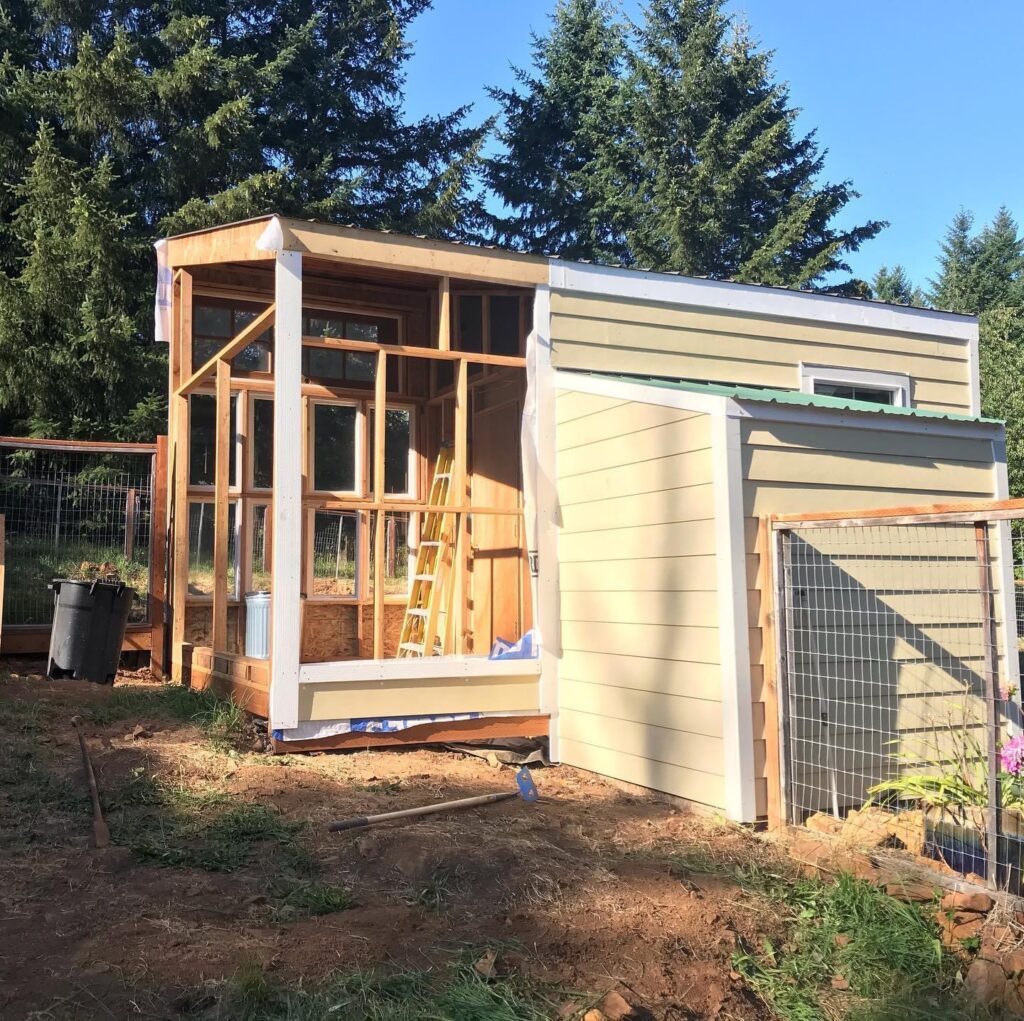
Before installing the last wall of windows (those two big ass windows I stored for almost four years), we needed to finish the floor.
Rocking it!
I do love a good deal…so when I found a shitload of bricks for a third of what it would cost retail, Jim even agreed. So what if it took us 6 or 7 trips and almost an entire Saturday…and about killed me…we scored! This will be used for various walkways and patios.
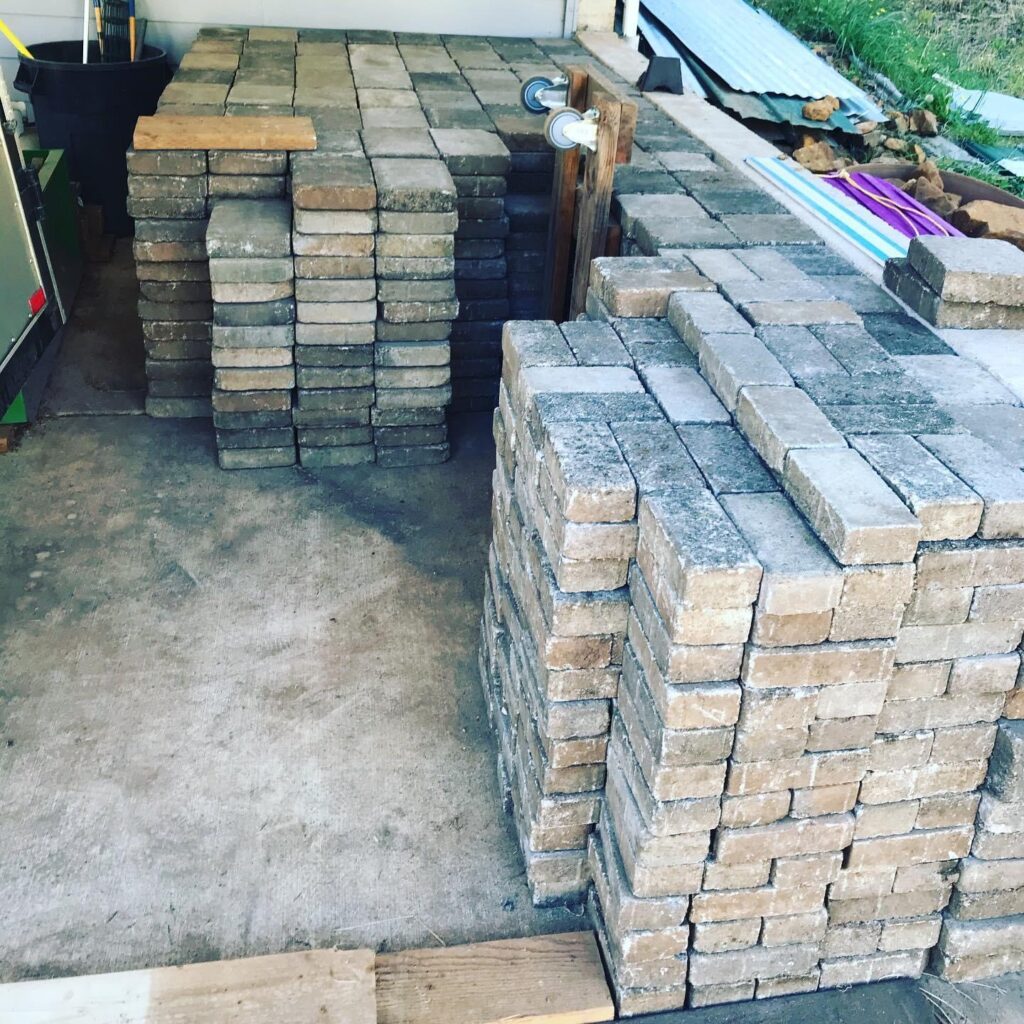
But first up was the floor of the greenhouse! We added base rock and sand, then the pavers!
Then we put in the last of the windows…viola!
We had to add the last bit of siding and then onto the fun part…
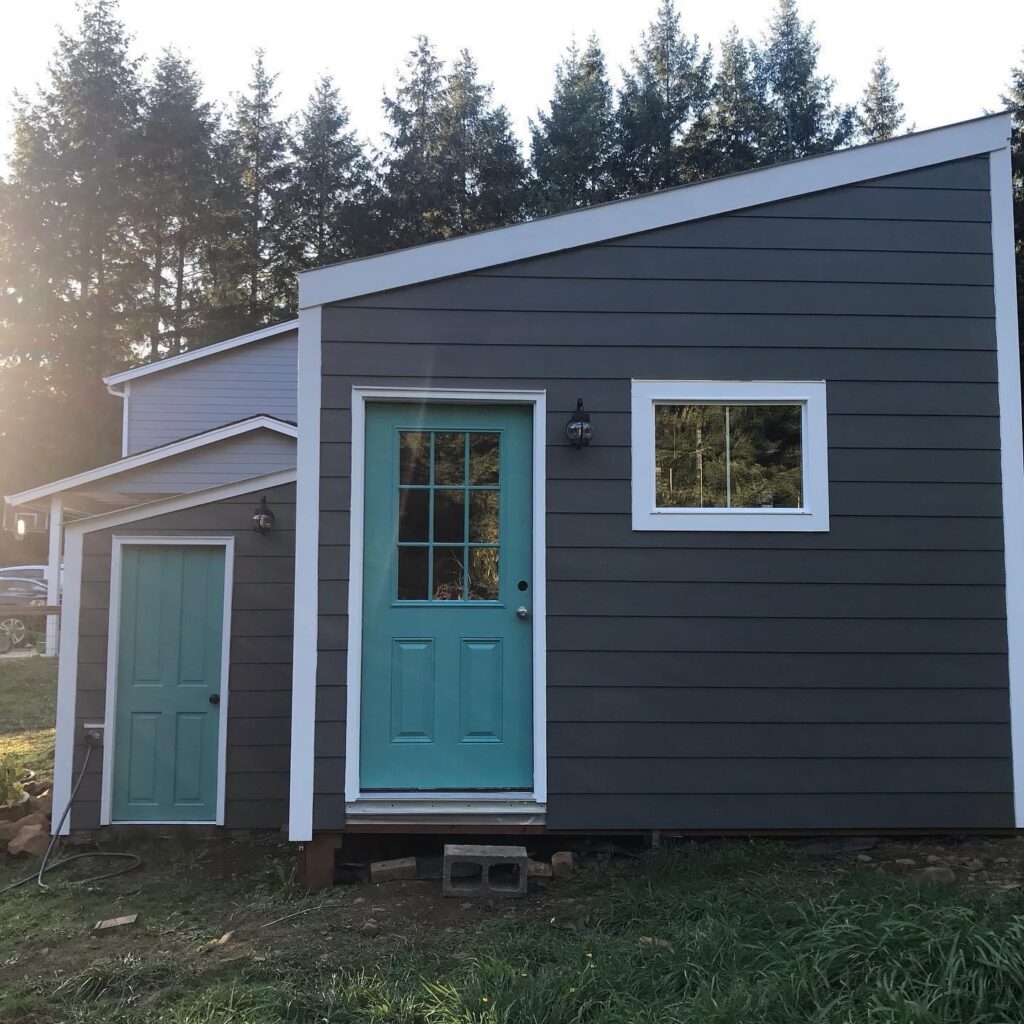
Paint all the things!
The hardest part of the project was picking paint colors. I was so indecisive but ended up going with what I liked despite it not matching the house. At least I know what color I want to repaint the house!
POP!
POP POP!
Viola! Onto finishing the insides!